DIY Console Table

ECAC0CDC-13C3-498A-BFA1-3B0D65E22373

I have been wanting to redo this space in my breakfast area for some time.  It is a tight space because I have a hutch on the left side of the table and this little table on the right side. The table is really too short and too wide for the space.  Okay…if I’m truly honest about the situation…I need a table that is longer and has more storage to display/store my growing collection of Rae Dunn Pottery.  I want to stop buying it….I really do….  It’s all Rae Dunn’s fault!  She will not quit making cute pottery!  So, I have no other choice, but to build a new table to house it all 🙂

IMG_1443

I did look for a table to purchase, but nothing I found was quite right for the space…at least not according to the picture in my head.  So what is a girl to do you ask?….Well, she just needs to go search through the many Ana White furniture plans at www.ana-white.com and find the perfect table. So, I did just that!

IMG_1439

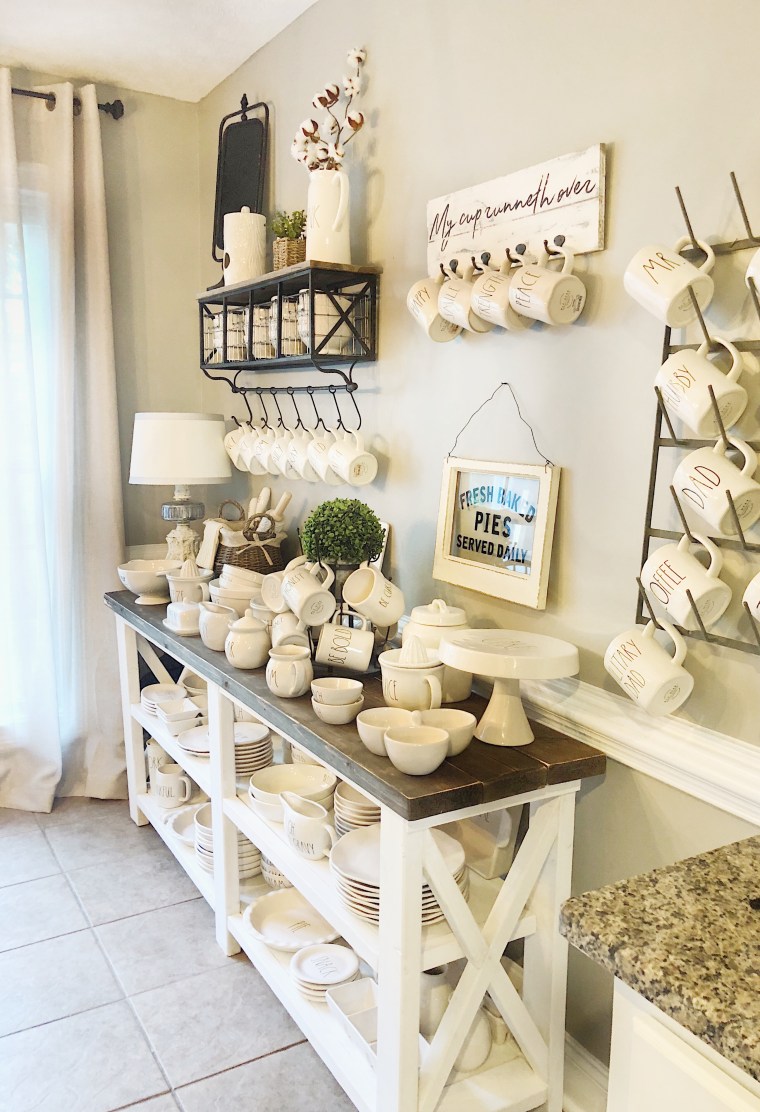
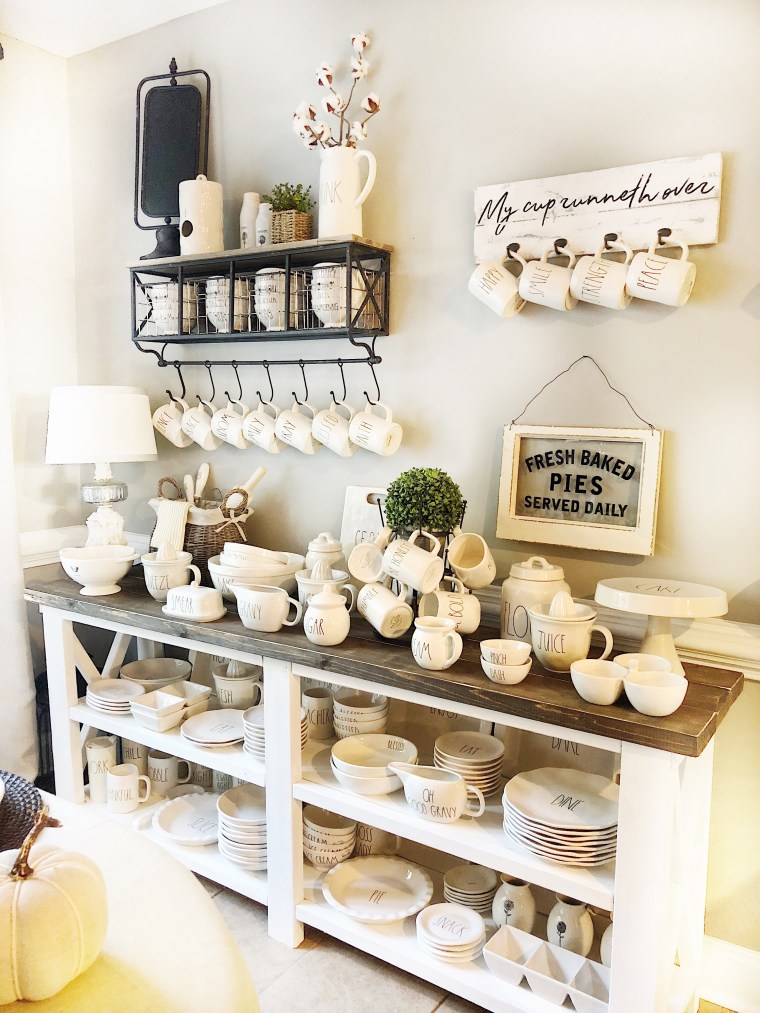
I selected the Rustic X Console Table.  I loved the design, it was longer than my current table, had three levels of storage, and it was shallow which would allow more space around my breakfast table.

FullSizeRender-1

I printed off the plans, headed to Home Depot for supplies, and got started.  It also provided me a reason to use my Kreg Jig for the first time and I love it!  It was an easy build, and I felt quite accomplished once it was completed.  My table has some intentional flaws to give it a distressed look and a few unintentional ones, that I hope you can’t see lol.

IMG_1446

The best part is that it really does hold a lot of my Rae Dunn collection allowing me to clear out the many piles that had taken over my craft room.  Now on to my craft room makeover… 🙂

IMG_1447

FullSizeRender-2

Want to make your own?  Click the link below to access the Ana White free plans.

Rustic X Console Table


signature-png 2


DIY Upholstered Headboard

When I began to plan the master bedroom “mini” makeover, I knew I wanted to remove our existing headboard and build a new one.  I wanted a softer look so, I decided to build/upholster a new one.

1178769C-B31E-47D6-AFC0-74DAC1E62B4F

I began the project by sketching the shape I wanted for the headboard. I then measured the width of my bed and determined my desired width and height for the headboard. I used that information to plan how I would build it….

While I love to browse around Home Depot and Lowes, I am adamant about having a detailed supply list when shopping for my materials.  Therefore, I planed every cut and created a supply list and cut list.

I made my purchases, drew the shape I wanted on my plywood, and cut it out.  Note: After drawing the first “curved” corner, I made a template to trace for the other one to make sure they would be exactly the same. I then duplicated it for the back.

img_4802-copy.jpg

IMG_4833

I sandwiched the legs between the front and back pieces of plywood.I added wood pieces around the top and bottom edges as well. This provided the thickness I wanted it to have and allowed the legs to be mostly concealed.

IMG_4825

I added smaller blocks of wood to mimic the curves.  I was then able to add the back piece.  Note:  I also added a few pieces of wood in the center to keep it sturdy and taunt.

IMG_4853

In hindsight, I should have upholstered (or painted) the legs before attaching them.  It would have been much easier than doing it after the fact.

IMG_4855

After attaching batting to the front side of the headboard, I drew a line around the edges  approximately three inches in to mark where I wanted the nail heads to go.  I stapled the batting along the line to create an indention.

IMG_4859

IMG_4864

Next I added the fabric. I chose a gray “faux” velvet and feels incredible.  I am a texture person…I know it is silly.  However, if it doesn’t feel good to the touch, I don’t want it. I added a fabric chalk line around the indented edge to serve as a guide for keeping the nail heads straight.

IMG_4875

Once again, I stapled along the line where I wanted to place the nail heads to give it more definition….making sure to stay on the line.

Now here is the cool part. When I went shopping for nail heads, I didn’t like the look of the “faux” nail heads that come in a strip and you hammer in every fourth or fifth one.  I couldn’t find enough individual ones that matched to do the project either.  Yes, I know I could have ordered them and have them in 2 days, but I wasn’t patient enough for that.  So….I came up with a different idea….thumb tacks!  I stopped by the dollar tree and purchased several packs.  They obviously aren’t designed to work on this project so just hammering them in like a regular nail head wasn’t an option. The pins weren’t long enough.  So…what’s a girl to do?  When all else fails….grab a glue gun!  I snipped off the pins with wire cutters and glued the heads over the staple line.

I was amazed at how well it worked and I was very pleased with the end result.

E7862993-9541-42BE-8B8A-3C026A980F52


signature-png 2

And so it begins…

I absolutely love to read a good blog!  Rather than picking up a magazine in the checkout line these days, I catch up on my blog reading instead. I plan to include my favorites on here for your reading enjoyment.  However, I will share that my “first” blog of choice from the very beginning was/is http://www.southernhospitalityblog.com. It is my perfectly prepared “cup of tea” tall icy glass of sprite with lime!

I have wanted to write a blog for some time, but have put it off for multiple reasons. More than anything, I didn’t want to start it and then not properly maintain it. Additionally,  I wasn’t sure anyone would be interested in my DIY projects or what I had to say.  All said and done… I enjoy writing, decorating, pulling out my paint brushes or tools for a quick “makeover”, and simply channeling my creative energy into a new project.  So, I have decided to run with it.  Hopefully, others will find it to be helpful or at least, an enjoyable read.  If not, I know my sweet mom and sister will read it :).

Signature png