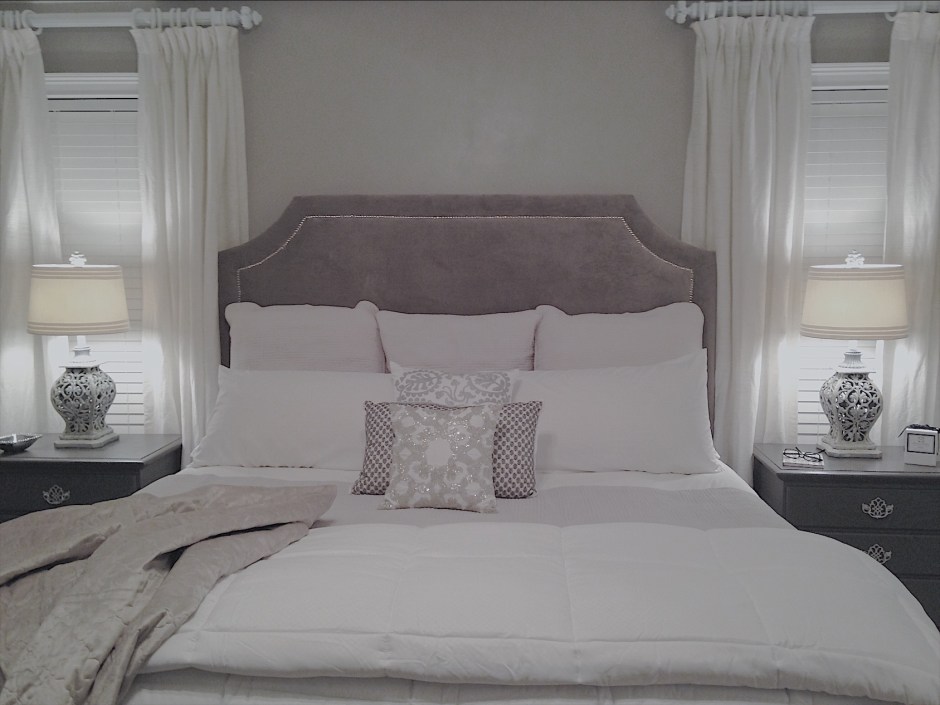
When I began to plan the master bedroom “mini” makeover, I knew I wanted to remove our existing headboard and build a new one. I wanted a softer look so, I decided to build/upholster a new one.

I began the project by sketching the shape I wanted for the headboard. I then measured the width of my bed and determined my desired width and height for the headboard. I used that information to plan how I would build it….
While I love to browse around Home Depot and Lowes, I am adamant about having a detailed supply list when shopping for my materials. Therefore, I planed every cut and created a supply list and cut list.
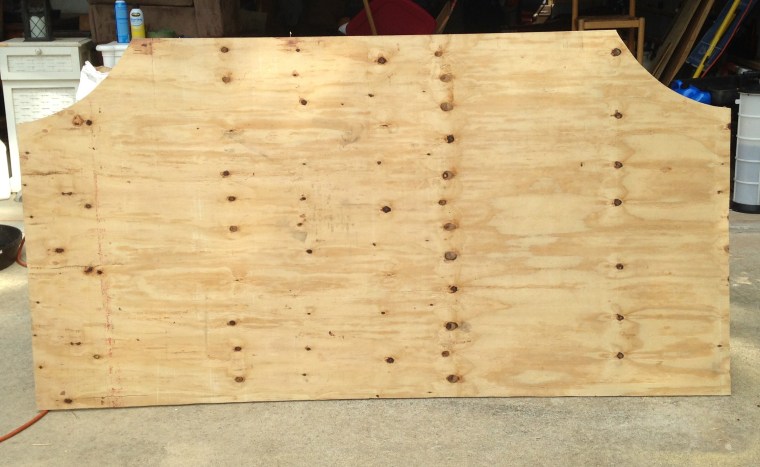
I made my purchases, drew the shape I wanted on my plywood, and cut it out. Note: After drawing the first “curved” corner, I made a template to trace for the other one to make sure they would be exactly the same. I then duplicated it for the back.

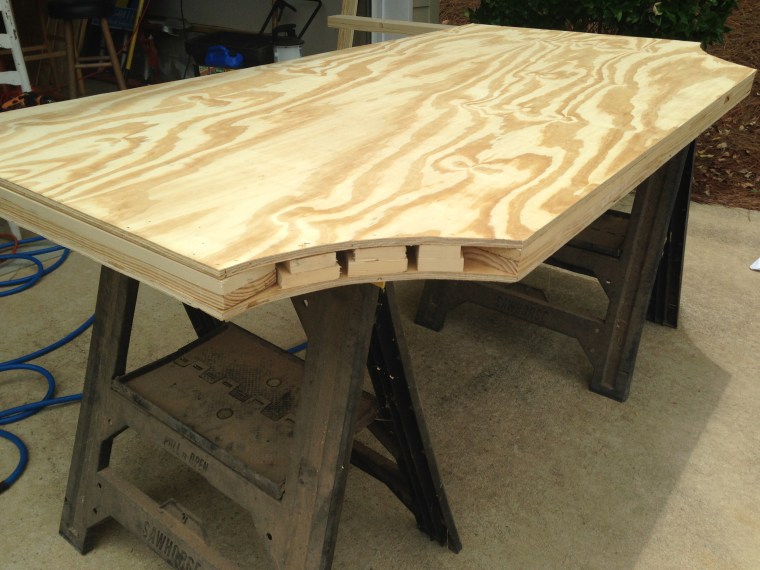
I sandwiched the legs between the front and back pieces of plywood.I added wood pieces around the top and bottom edges as well. This provided the thickness I wanted it to have and allowed the legs to be mostly concealed.

I added smaller blocks of wood to mimic the curves. I was then able to add the back piece. Note: I also added a few pieces of wood in the center to keep it sturdy and taunt.
In hindsight, I should have upholstered (or painted) the legs before attaching them. It would have been much easier than doing it after the fact.

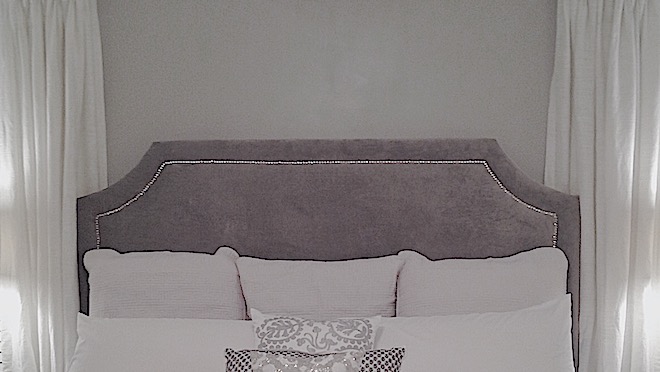
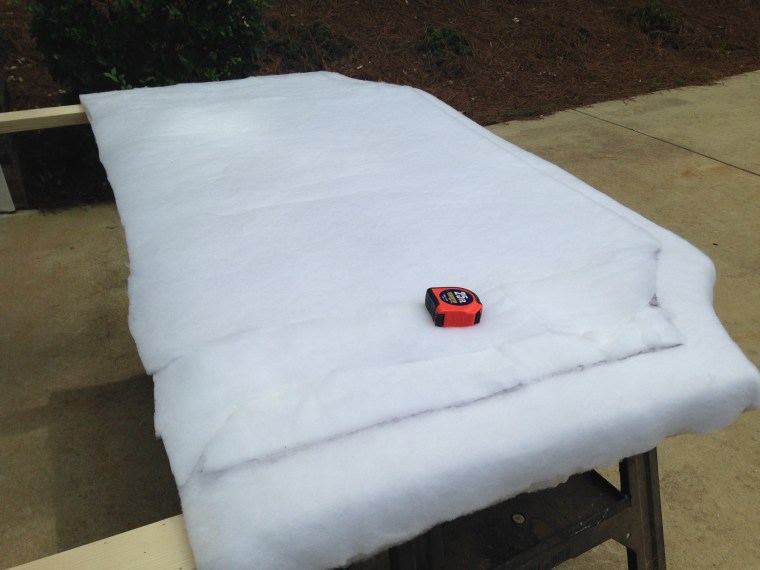
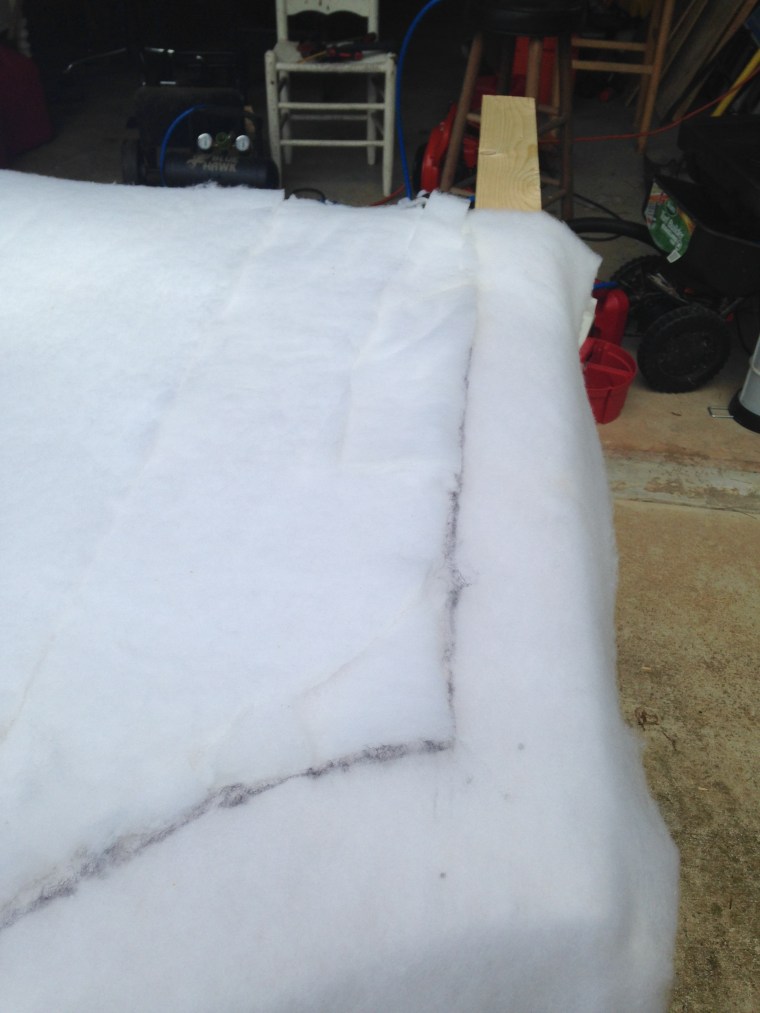
After attaching batting to the front side of the headboard, I drew a line around the edges approximately three inches in to mark where I wanted the nail heads to go. I stapled the batting along the line to create an indention.
Next I added the fabric. I chose a gray “faux” velvet and feels incredible. I am a texture person…I know it is silly. However, if it doesn’t feel good to the touch, I don’t want it. I added a fabric chalk line around the indented edge to serve as a guide for keeping the nail heads straight.

Once again, I stapled along the line where I wanted to place the nail heads to give it more definition….making sure to stay on the line.


Now here is the cool part. When I went shopping for nail heads, I didn’t like the look of the “faux” nail heads that come in a strip and you hammer in every fourth or fifth one. I couldn’t find enough individual ones that matched to do the project either. Yes, I know I could have ordered them and have them in 2 days, but I wasn’t patient enough for that. So….I came up with a different idea….thumb tacks! I stopped by the dollar tree and purchased several packs. They obviously aren’t designed to work on this project so just hammering them in like a regular nail head wasn’t an option. The pins weren’t long enough. So…what’s a girl to do? When all else fails….grab a glue gun! I snipped off the pins with wire cutters and glued the heads over the staple line.


I was amazed at how well it worked and I was very pleased with the end result.